How to Pleat Fabric? Step-by-Step Guide for Perfect Results

Learning how to pleat fabric can unleash your creativity, whether you’re into fashion, DIY projects, or just want to spruce up your clothes.
Pleating involves folding and pressing the fabric to create stylish folds and textures. You can use it for skirts, dresses, pants, and even home decor.
In this article, we’ll show you the step-by-step process of pleating fabric. You’ll learn various pleat types, tips for maintaining pleated items and troubleshooting common pleating problems.
Get ready to add a unique touch to your garments and express your style through pleating.
What Are Pleats?
Fabric pleating is a timeless technique that adds dimension and style to clothing and textiles. Pleats in clothing and textiles refer to folds that are stitched or pressed into the fabric, creating a structured and decorative element.
They can be found in various garments, such as skirts, dresses, pants, and even shirts. The purpose of pleats goes beyond aesthetics; they also serve functional purposes, such as providing ease of movement and allowing for a better fit.
Different Types Of Pleats And Their Characteristics

There are several types of pleats, each distinguished by their appearance and construction. Understanding the characteristics of different pleat styles can help you choose the most suitable option for your desired look.
Here are some common types of pleats and their notable features:
Box pleats:
These pleats are created by folding the fabric in opposite directions, resulting in a neat and structured appearance. Box pleats are often used to add fullness to skirts and dresses while maintaining a tailored look.
Knife pleats:
Knife pleats are simple, narrow folds that are pressed in the same direction. They create a sharp and sleek effect, commonly seen in school uniforms and formal skirts.
Accordion pleats:
Also known as sunburst or fan pleats, accordion pleats are narrow, pressed folds that resemble the shape of an accordion. They are versatile and can add movement and texture to various garments.
Inverted pleats:
Inverted pleats are created by folding the fabric inwards, resulting in a clean and streamlined look. They are often used in trousers and skirts to provide additional room and ease of movement.
Whether aiming for a sophisticated or casual look, incorporating pleats into your clothing and textiles can elevate their overall appeal. By understanding the different types of pleats and their characteristics, you can make informed choices when adding this timeless technique to your wardrobe.
So, go ahead and experiment with pleating to create stunning and fashionable garments that showcase your style.
How to Pleat Fabric?
If you want to add some beautiful pleats to your fabric, you’ve come to the right place! Pleating fabric can add dimension and interest to any garment or home decor project.
Follow these simple steps to achieve perfectly pleated fabric every time.
Step 1: Determine The Desired Pleat Size And Type
Before you begin pleating your fabric, it’s important to decide on the size and type of pleats you want to create. Consider the overall look you’re aiming for and choose between knife pleats, box pleats, or accordion pleats.
Once you’ve decided on the pleat type, determine each pleat’s desired width and depth.
Step 2: Calculate The Fabric Length
To ensure you have enough fabric for the pleats, it’s crucial to calculate the required length. Measure the area where you want to add pleats and multiply the measurement by the number of pleats you plan to make.
Don’t forget to account for seam allowances and any additional fabric you may need for finishing touches.
Step 3: Marking The Pleat Placement
Once you have determined the pleat size and calculated the fabric length, it’s time to mark the pleat placement on your fabric.
Use chalk or fabric markers to draw guidelines indicating where each pleat will be folded. Make sure the markings are clear and easily visible.
Step 4: Folding And Securing The Pleats
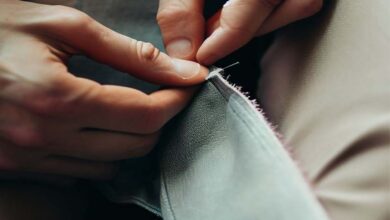
Now it’s time to fold and secure the pleats. Start by bringing the fabric along the marked pleat lines together, ensuring the folds are neat and even.
Pin or baste the pleats in place to prevent them from shifting while you work on the rest of your project.
Take your time to ensure each pleat is precise and secure.
Step 5: Finishing The Pleats
To give your pleats a polished finish, press them with an iron. Set the iron to the appropriate heat setting for your fabric and gently press the pleats, being careful not to distort their shape.
If desired, you can also stitch over the top of the pleats to add extra reinforcement and prevent them from coming undone.
Now that you know the steps to pleating fabric, you can confidently incorporate this technique into your sewing projects.
Whether you’re adding pleats to a skirt, dress, or decorative pillow, these steps will guide you toward achieving beautiful and professional-looking results.
So grab your fabric and start pleating.
Tips For Maintaining Pleated Fabric

To maintain pleated fabric, handling it with care is crucial to preserve the delicate folds. When storing pleated garments or fabric, opt for padded or clip hangers to provide adequate support and prevent the plate from flattening.
Avoid folding or stacking pleated items in storage, leading to permanent creases and distorting the pleats.
During travel, take extra precautions by using garment bags or rolling the items carefully to minimize wrinkles and maintain the pleats’ structure.
Upon arrival at your destination, hang the pleated garments to allow any wrinkles to fall out naturally.
Before dry cleaning pleated items, always check the care instructions, as some fabrics may not tolerate traditional dry cleaning methods and could lose their pleats or become damaged.
If the fabric is washable, opt for gentle hand washing using mild detergent and lukewarm water. Gently press out excess water, but avoid wringing or twisting the fabric, as this can distort the pleats. Lay the item flat on a towel, reshape the pleats, and let it air dry.
If you need to touch up pleats, use a low heat setting on your iron and place a pressing cloth between the iron and the fabric to protect the pleats. Avoid ironing directly on the pleats, as excessive heat or pressure can damage them.
Consider using a handheld steamer to freshen up pleated fabric, as it allows you to remove wrinkles without putting direct heat on the pleats.
Lastly, be cautious when wearing pleated items with bags or accessories that have rough surfaces, as constant rubbing or friction can cause pleats to wear out or become misshapen over time.
When storing pleated scarves or other accessories, roll them gently and keep them in a dedicated drawer or compartment to protect the pleats.
With proper care and attention, the pleated fabric will retain its elegant appearance and shape, ensuring you can enjoy its beauty for a long time.
Always refer to the care instructions provided by the fabric manufacturer or garment maker for specific guidance on maintaining pleated items.
Troubleshooting Common Pleating Problems

Pleating fabric can sometimes present challenges, but you can overcome common pleating problems with some troubleshooting.
Here are some common issues you may encounter when pleating fabric and how to address them:
Uneven spacing between pleats:
- Cause: Inaccurate measuring or marking of the fabric.
- Solution: Always measure and mark the fabric carefully using a ruler or measuring tape. Take your time to ensure equal spacing between each pleat.
Uneven pleat depth:
- Cause: Inconsistent folding or pressing of the fabric.
- Solution: Use a ruler or a pleating tool to ensure that each pleat is folded to the same depth. Press the pleats with an iron to set them properly and achieve uniformity.
Pleats won’t hold their shape:
- Cause: Insufficient pressing or using the wrong fabric type for pleating.
- Solution: Press the fabric properly after folding the pleats to help set the folds. If the fabric is too lightweight or slippery, consider using starch or fabric stabilizer to help the pleats hold their shape.
Pleats are too bulky or thick:
- Cause: Using heavyweight or thick fabric for pleating.
- Solution: Choose a lighter-weight fabric that is more suitable for pleating, especially if you need sharp and crisp pleats.
Fabric shifting during pleating:
- Cause: The fabric is not securely held in place while folding the pleats.
- Solution: Use pins to hold the fabric in place before folding the pleats. This will help prevent the fabric from shifting and ensure accuracy.
Pleats look messy or uneven:
- Cause: Inconsistent folding technique or rushing through the process.
- Solution: Take your time and be patient when folding the pleats. Double-check your work as you go and make adjustments if necessary.
Pleats don’t align with the fabric grain:
- Cause: Not paying attention to the fabric grain while pleating.
- Solution: Ensure that the pleats run parallel to the fabric grain for a more professional finish and proper draping.
Visible pin marks or holes:
- Cause: Using the wrong type of pins or pressing too hard.
- Solution: Use fine pins suitable for your fabric type to avoid leaving visible marks. Press the fabric gently to prevent damage.
Pleats not holding after sewing:
- Cause: Inadequate stitching or not securing the pleats properly.
- Solution: Use a suitable sewing technique to secure the pleats, such as stitching them down or adding tacking stitches. Ensure that the stitches are sturdy enough to hold the pleats in place.
Remember that practice makes perfect when it comes to pleating fabric. If you encounter problems, don’t be discouraged. Take your time, make adjustments, and keep refining your technique until you achieve the desired results.
Frequently Asked Questions On How To Pleat Fabric?
What Is The Purpose Of Pleating Fabric?
Pleating fabric adds texture, volume, and visual interest to garments and home decor. It can create structured and tailored looks or add a touch of femininity and elegance.
Pleats can manipulate fabric drapes and silhouettes, enhancing a garment or project’s overall design and style.
Can You Pleat Any Type Of Fabric?
Yes, you can pleat various fabric types, such as cotton, silk, polyester, satin, and chiffon. However, some fabrics are more suitable for pleating than others.
Fabrics with natural fibers like cotton and silk tend to hold pleats better, while fabrics with synthetic fibers like polyester may require additional techniques or treatments to achieve desired results.
Conclusion
Now that you’ve learned the art of fabric pleating, you can unlock a new world of creative possibilities. With the proper techniques and tools, you can transform ordinary fabric into stunning textures and designs that add visual interest to your projects.
Whether you’re a fashion designer looking to create unique garments or a DIY enthusiast wanting to add a special touch to your home decor, mastering the art of pleating fabric is a valuable skill.
Remember to experiment with different pleating styles, such as accordion, box, or knife pleats, and choose the right fabric that holds the shape well.
You can achieve beautiful pleats that enhance your creations with practice and patience. So go ahead, let your creativity shine, and enjoy the process of pleating fabric.
Read more:


